



How to Build a Pressure Washing Trailer From Scratch
|
|
Time to read 15 min
|
|
Time to read 15 min
Most people who want to launch a pressure washing business assume they need a welding rig, a garage full of tools, and a month of weekends to build a functional trailer. That assumption stops a lot of good operators before they ever spray their first driveway.
The truth is more encouraging. You can build a professional-grade pressure washing trailer without cutting, welding, or fabricating anything from raw metal. The key is understanding which parts of the build actually matter, which parts you can buy pre-engineered, and how to assemble everything into a reliable, revenue-ready system.
This guide walks through the entire process, from choosing your trailer platform to dialing in the pressure, technique, and surface prep that separates amateur results from professional ones. By the end, you'll know exactly how to put together a rig that works hard, lasts long, and doesn't drain your startup budget on custom fabrication.
Building your own pressure washing trailer comes down to one principle: assembly over fabrication. You are combining proven components onto a stable platform, not engineering a machine from nothing.
The smartest builds start with the recognition that the "from scratch" mindset is where people waste the most time and money. You don't need to design a frame, calculate load distribution, or weld a mounting system if you approach the build the way seasoned operators do.
Your foundation is a standard utility trailer. A 5x8 or 6x10 open utility trailer handles most residential setups comfortably. If you plan to run commercial jobs with larger water tanks and multiple operators, look at a 6x12 or an enclosed trailer for security and weather protection.
You do not need a specialty trailer. A used, roadworthy utility trailer with good tires, working lights, and a solid deck is a perfect starting point. Buying used here is one of the biggest money-savers in the entire build, and it keeps your capital available for the equipment that actually generates income.
Before you mount anything, confirm three things: the trailer's gross weight rating can handle a full water tank (water weighs about 8.3 pounds per gallon, so a 200-gallon tank adds roughly 1,660 pounds), the deck is structurally sound, and the tongue and hitch match your tow vehicle.
Every pressure washing trailer, regardless of size, relies on the same handful of systems:
A water supply tank to buffer against low-flow spigots and give you continuous pressure
A pressure washer unit (engine and pump) sized to your target work
A hose reel and pressure hose for reach and quick cleanup
A softwash system if you plan to clean roofs, siding, or delicate surfaces
A secure mounting system that keeps everything stable during transport
The mounting system is where builds succeed or fail. Loose equipment shifts on the road, damages fittings, and creates safety hazards. This is exactly where a purpose-built solution earns its place, which we'll cover in the no-welding section below.
Yes, and for most operators it's the better choice. Welding introduces cost, skill requirements, and permanent decisions that are hard to reverse. A no-weld build is faster, more flexible, and just as durable when done correctly.
The no-weld approach relies on three fastening methods: bolt-on mounting, engineered bracket systems, and modular equipment platforms that are designed to drop directly onto your trailer deck.
Bolting is stronger than most beginners expect. Grade-5 or grade-8 bolts with proper backing plates create connections that easily handle the vibration and load of highway travel. The advantage over welding is reversibility. If you upgrade your pump, reconfigure your layout, or sell the setup, bolted components come apart cleanly.
This is where a modular unit changes the entire equation. Rather than sourcing individual brackets, tanks, and mounts and figuring out how they fit together, a system like the TrailerPod™ arrives as an integrated softwash and pressure wash platform that installs onto your trailer without any fabrication. Its PolyPro™ construction is rust-proof and lightweight, which matters more than most people realize: metal frames add weight and corrode from constant water exposure, while a poly-based system shrugs off moisture and keeps your trailer's payload capacity available for water rather than hardware.
For anyone who wants a professional result without a welder, a grinder, or fabrication experience, the no-weld path isn't a compromise. It's the professional standard for fast, repeatable builds.
Once your platform is ready, the actual "build" is a logical sequence of connecting components in the right order. Here's how the system comes together.
Mount your water tank first, since it's the heaviest component and dictates weight distribution. Position it over or slightly ahead of the trailer axle to keep tongue weight balanced. A poly tank in the 100–325 gallon range covers most operators.
The tank feeds your pump through a supply line with a shutoff valve. Buffering water through a tank instead of running straight from a customer's spigot protects your pump from cavitation (running dry when flow drops) and guarantees consistent pressure.
Your pressure washer unit is the heart of the system. It consists of a gas engine driving a pump. Mount it on a stable, vibration-dampened surface and connect the inlet to your water tank and the outlet to your hose reel.
Secure the engine with proper fasteners and confirm the fuel system, oil levels, and pump lubrication before the first start. A loose or poorly mounted pump vibrates itself apart and leaks at the fittings.
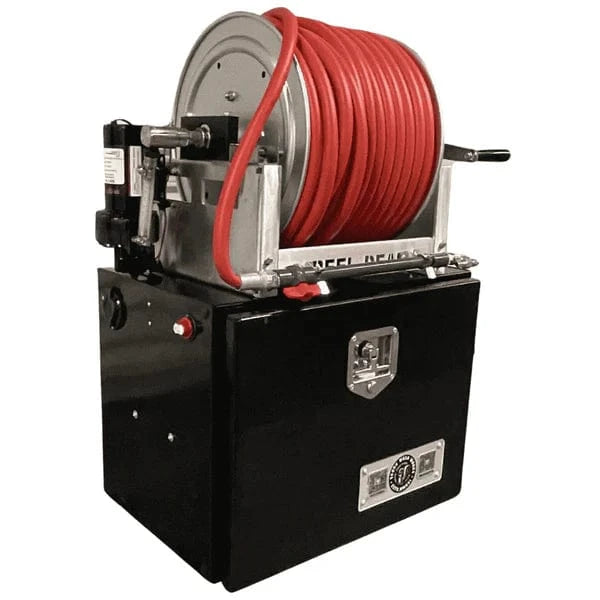
A hose reel keeps your pressure line organized and extends its lifespan by preventing kinks and abrasion. Mount it where an operator can pull line easily without climbing over other equipment. Standard setups run 100–200 feet of pressure hose so you can reach a backyard without repositioning the trailer.
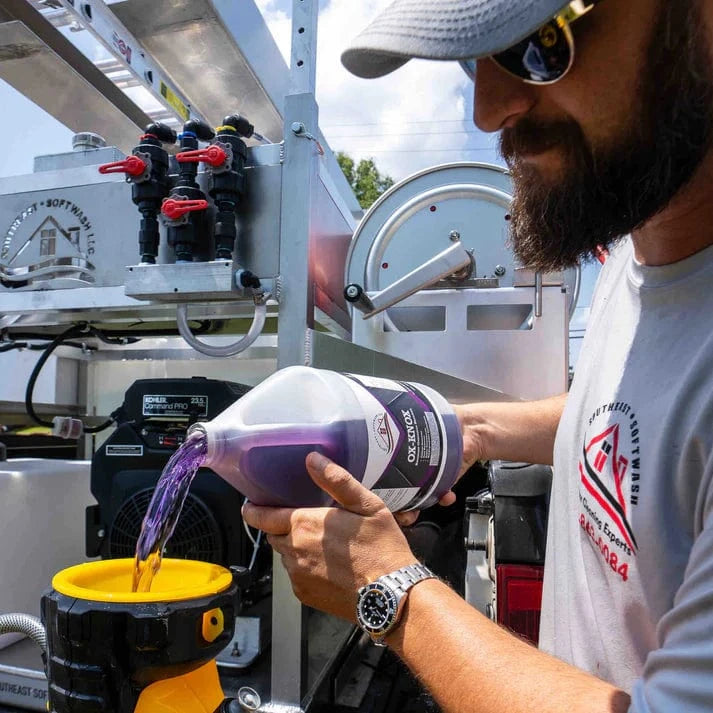
Softwashing uses low pressure and cleaning solutions to safely clean roofs, siding, and other surfaces that high pressure would damage. If your service menu includes these jobs, integrate a softwash system with a chemical tank, a proportioner or downstream injector, and dedicated hosing.
Running both pressure washing and softwashing from one rig dramatically expands the jobs you can accept. Integrated units like the TrailerPod™ are built to handle both functions on a single platform, which is why they appeal to operators who don't want two separate systems competing for deck space.
You can technically assemble a pressure washer from an engine, a pump, unloaders, hoses, and fittings. Experienced mechanics sometimes do this to hit a specific spec or salvage costs.
For most people, though, sourcing and matching individual components introduces compatibility risks and warranty headaches. Buying a pre-built pressure washer unit and integrating it into your trailer is faster, safer, and usually cheaper once you account for the parts you'd otherwise buy twice. The "build" that earns money is the trailer system, not the pump internals.
Pressure requirements depend entirely on the surface. Using too much pressure damages surfaces; using too little wastes time and leaves jobs half-clean. Matching PSI to the task is a core professional skill.
Here are practical ranges:
1,300–1,900 PSI — Light-duty residential work: cars, outdoor furniture, and delicate surfaces
2,000–2,800 PSI — General residential cleaning: fences, vinyl siding (with care), and patios
2,900–3,300 PSI — Concrete, driveways, sidewalks, and heavy grime
3,300+ PSI — Commercial and industrial cleaning, stubborn stains, and paint prep
For a versatile trailer that handles both residential and commercial work, a unit producing around 3,000–4,000 PSI gives you range, since you can always dial pressure down but never up past your machine's ceiling.
Just as important as PSI is GPM (gallons per minute). Flow does the real cleaning work by rinsing dirt away, while pressure breaks it loose. A machine with 4 GPM at 3,000 PSI outperforms one with 2 GPM at 4,000 PSI on most surfaces. Professionals prioritize a healthy balance of both.
Nozzle color tells you the spray angle, and the angle determines both pressure intensity and coverage. This is standardized across the industry:
Red (0°) — A pinpoint jet and the most powerful, most concentrated tip. It delivers maximum force to a tiny area and can gouge concrete, etch wood, or cut skin. Most professionals rarely use it because the risk of surface damage outweighs the benefit.
Yellow (15°) — Strong stripping angle for tough grime and paint prep
Green (25°) — The everyday workhorse for general cleaning
White (40°) — Gentle, wide spray for delicate surfaces and rinsing
Black (65°) — The low-pressure "soaping" tip used for applying detergent
So when people ask which tip is the most powerful, the answer is the red 0° nozzle. But powerful doesn't mean best. The concentrated force is exactly why experienced operators reach for it sparingly and default to green or white for most work.
Great technique is what makes the difference between a clean surface and a streaky, damaged one. The mechanics matter as much as the machine.
Work in consistent, overlapping strokes. Overlap each pass by about 50% to avoid leaving lines and uneven cleaning. Move at a steady pace rather than lingering, since holding the nozzle in one spot concentrates pressure and can etch the surface.
Maintain a consistent distance and angle. Start with the nozzle 18–24 inches from the surface and move closer only as needed. Hold the spray at a slight angle rather than straight on so you push debris ahead of you instead of blasting it into the surface.
Clean top to bottom on vertical surfaces to let dirty water run down over areas you haven't cleaned yet, then do a final rinse from top to bottom again. On horizontal surfaces like driveways, work in the same direction to keep your pattern even.
Use detergent strategically. Apply cleaning solution with a low-pressure tip, let it dwell for several minutes (but don't let it dry), then rinse. Pre-treating with the right chemistry does more work than raw pressure and protects the surface. This is where softwashing capability pays off, since many surfaces clean better with chemistry and low pressure than with brute force.
The best operators plan around surface preparation and conditions, not just equipment. Two areas cause the most avoidable problems: concrete prep and timing.
Pre-treat concrete with a dedicated concrete or degreaser cleaning solution before you pressure wash. Applying a cleaner first breaks down oil, grease, mildew, and embedded grime so the pressure washer rinses it away instead of fighting it.
For general dirt, a mild alkaline concrete cleaner works well. For oil and grease stains common on driveways and garage aprons, use a degreaser and let it dwell for 5–10 minutes. For mold, mildew, or algae, a sodium hypochlorite-based solution (the foundation of most softwash mixes) kills the organisms at the root so they don't return in weeks.
Sweep away loose debris first, wet the surface, apply your cleaner evenly, and give it time to work before you start spraying. This single step reduces your cleaning time, protects the concrete from unnecessary high-pressure passes, and produces a far more even result.
Wait at least 28 days before pressure washing new concrete. Concrete continues to cure and gain strength for weeks after it's poured, and its surface is most vulnerable during that window. High pressure applied too early can pit, etch, or permanently mar the finish.
Twenty-eight days is the standard benchmark because that's when concrete reaches roughly 90% of its designed strength. If you're cleaning fresh work for a client or a new build, confirm the pour date and hold off. When you do wash newly cured concrete, start with lower pressure and a wider tip to be safe.
The best time to pressure wash is mid-morning on a mild, overcast, or partly cloudy day. This timing gives you several advantages that directly affect results.
Cooler, cloudy conditions keep cleaning solutions from evaporating too fast, which is critical because detergents and softwash chemicals need to stay wet to work. On a hot, sunny surface, your solution dries before it can do its job, leaving streaks and forcing you to redo the work.
Mid-morning also gives surfaces time to dry before evening, reducing the risk of moisture-related issues like mildew regrowth. Avoid freezing temperatures, which can damage equipment and create ice hazards, and avoid the peak heat of a summer afternoon.
Seasonally, spring and fall are ideal because temperatures are moderate and demand is high as customers prep for summer or clean up afterward. Planning your schedule around weather isn't just about comfort; it directly improves the quality of every job you complete.
A lightweight, rust proof pressure washing trailer unit made with durable PolyPro™ Construction for strength, longevity and a clean professional look.
Multi-Operator ReadyRun full crews from one rig, finish jobs in half the time, and double your daily revenue, all from a single setup.
The Easiest InstallThe TrailerPOD™ drops right onto your trailer, bolts down, and you're washing.
Even with good equipment, a handful of predictable mistakes trip up new operators. Avoiding them protects your surfaces, your gear, and your reputation.
Using too much pressure on delicate surfaces. The most common beginner error is reaching for maximum PSI and the narrowest tip on everything. This etches wood, cracks vinyl siding, and gouges concrete. Match your pressure and nozzle to the surface, and lean on chemistry and softwashing for anything fragile.
Building on an overloaded trailer. People underestimate water weight and mount a tank their trailer can't legally or safely carry. Always verify your trailer's gross weight rating against a full tank, and keep your build lightweight where you can. A rust-proof poly system instead of a heavy metal frame preserves payload for water where it counts.
Welding a permanent layout you'll outgrow. Fabricating a fixed setup feels professional until you upgrade your pump or reconfigure your workflow and can't. A bolted, modular build gives you flexibility that welded rigs can't match, and it removes the need for fabrication skills entirely.
Skipping surface prep. Blasting dirty concrete without pre-treating wastes time and forces you to use excessive pressure. A few minutes of applying cleaner and letting it dwell does more than several extra minutes of spraying.
Washing new concrete too soon. Cleaning concrete before it has cured 28 days can permanently damage the surface. When in doubt, confirm the pour date and wait.
Letting detergent dry on the surface. Applying cleaner in direct sun or walking away too long lets it dry and streak. Work in shade or cooler conditions and keep the surface wet until you rinse.
Poorly securing equipment. Loose pumps, tanks, and reels shift during transport, damage fittings, and create road hazards. Every component needs a stable, vibration-resistant mount, which is one reason integrated platforms outperform piecemeal builds.
Running the pump dry. Feeding your pump directly from an unreliable spigot instead of buffering through a water tank causes cavitation and destroys pumps. A supply tank is not optional for serious work.
The gap between a beginner and a professional shows up in efficiency, consistency, and the small habits that protect equipment and produce cleaner results.
Prioritize GPM alongside PSI. Beginners chase pressure; professionals chase flow. Higher gallons per minute means faster rinsing and shorter job times, which directly increases how many jobs you complete in a day. When choosing your pump, don't sacrifice flow for a higher pressure number you'll rarely use.
Set up for multi-operator efficiency. On larger jobs, having two people working from one rig cuts job time dramatically. Design your layout so two operators can pull hose and work simultaneously without tripping over each other. Systems built with multi-operator use in mind, like the TrailerPod™, make this seamless rather than an afterthought.
Pre-treat everything. The fastest cleaners spray their chemistry first, work another section while it dwells, then return to rinse. This staged workflow keeps you productive during dwell time instead of standing around waiting.
Standardize your nozzle progression. Keep your tips organized and default to green (25°) for general work, white (40°) for delicate surfaces, and black for soaping. Reserve red and yellow for specific tough spots. A quick-connect setup lets you switch tips in seconds.
Manage your water strategically. Know where you'll refill and how long your tank lasts at your typical flow rate. Running out mid-job on a customer's property looks unprofessional. Buffer with a tank sized to your most common jobs plus a margin.
Protect your investment from corrosion. Water and metal are a bad combination over time. Rust degrades brackets, tanks, and frames and shortens the life of your rig. Rust-proof construction eliminates this entire failure mode, which is why poly-based systems increasingly dominate professional builds.
Log your job settings. Track which pressure, tips, and chemistry worked for specific surfaces and stains. Over time this builds a personal playbook that lets you quote accurately and work faster.
Rinse and maintain daily. Flush your pump, drain lines in freezing weather, and inspect fittings after every job. Five minutes of maintenance prevents expensive failures and downtime.
Everything covered in this guide points to the same core challenge: building a reliable, professional pressure washing rig without the cost, weight, corrosion, and permanence of a custom-welded setup. That's precisely the problem the TrailerPod™ is designed to solve.
Throughout this article, a few themes kept surfacing. You want a build without welding or fabrication. You need to protect trailer payload for water rather than heavy hardware. You want both pressure washing and softwashing on one platform. You need equipment that survives constant water exposure without rusting. And you want a layout that supports efficient, multi-operator work.
The TrailerPod™ addresses each of these directly. Its PolyPro™ construction is lightweight and rust-proof, so it won't corrode from the water and chemicals that destroy metal-framed rigs over time, and it keeps your trailer's weight budget available for your tank. Because it's engineered for quick installation, you skip fabrication entirely and get a working rig in a fraction of the time a scratch build demands. It handles both softwash and pressure wash functions on a single unit, expanding the jobs you can accept without doubling your equipment. And it's built for multi-operator efficiency, so you can scale up on larger jobs.
Compared to the common alternatives, the advantages are practical. A fully custom welded rig requires fabrication skills, tools, and time most operators don't have, and it locks you into a layout you may outgrow. Piecing together individual brackets, tanks, and mounts leaves you solving compatibility problems and often costs more once everything is accounted for. Heavy metal-framed systems add weight and rust. An integrated, rust-proof, no-weld platform sidesteps all of these issues.
Who should use it? Operators launching or scaling a pressure washing business who want a professional rig fast, without fabrication, and who value durability and flexibility. It's especially well-suited to anyone offering both softwashing and pressure washing services.
Who might not need it? If you're a hobbyist washing your own driveway a few times a year, a simple consumer pressure washer is plenty. And if you're an experienced fabricator with the tools and a very specific custom vision, you may prefer building your own layout. For nearly everyone in between who wants to earn money without starting from scratch, an integrated system is the logical choice.
To use it effectively, pair it with a properly rated trailer, a water tank sized to your typical jobs, and the nozzle and chemistry practices covered above. The equipment removes the build headaches; your technique and workflow do the rest.
Building a pressure washing trailer doesn't require welding, fabrication, or starting from raw materials. The professional approach is assembly over fabrication: start with a sound utility trailer, bolt on proven components, buffer your water through a tank, and integrate both pressure washing and softwashing into one stable, rust-proof platform.
From there, results come down to fundamentals. Match your PSI and nozzle to the surface, prioritize flow as much as pressure, and default to gentler tips rather than the aggressive red 0°. Pre-treat concrete with the right cleaner, wait the full 28 days before washing new pours, and schedule your work for mild, overcast conditions so your chemistry has time to do its job.
Avoid the predictable mistakes, overloading your trailer, skipping surface prep, letting detergent dry, and running your pump dry, and adopt the professional habits that improve efficiency and protect your equipment.
If you want to get from idea to income without a welder, a garage full of tools, or weeks of trial and error, an integrated, no-weld system like the TrailerPod™ turns a standard trailer into a professional cleaning rig quickly and reliably. Build smart, work clean, and let your equipment work as hard as you do.